How to change a gullet on a Wintec or Bates Saddle
How to change a gullet on a Wintec or Bates Saddle
Whether you’ve purchased a new horse, a new saddle, or your horse has simply changed shape; there will come a time when you will need to change the gullet in your Wintec or Bates saddle.
Changing a gullet can be daunting, but it doesn’t need to be. We at Sheepham Saddles are here to show you how to change the gullet in your Wintec or Bates saddle easily, so you can spend even more time in the saddle!

Wintec and Bates Gullet Sizes
Wintec & Bates gullets come in many different sizes including:
- Yellow (Narrow)
- Green (Medium Narrow)
- Black (Medium)
- Blue (Medium Wide)
- Red (Wide)
- White (Extra Wide)
And for the Wintec & Bates wide range:
- White (1 Extra Wide)
- Lilac (2 Extra Wide)
- Violet (3 Extra Wide)
- Dark Purple (4 Extra Wide)
(Please note the wide range of gullets should only ever be used in the wide range of saddles).
11 Simple Steps to Changing a Gullet
step 1
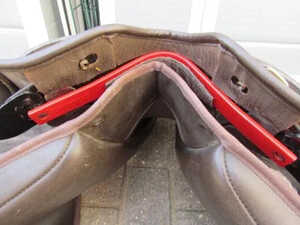
Buy the right size
First you will need to purchase the right sized gullet for your horse. All Wintec and Bates saddles come with a medium (black) gullet as standard, which won’t be suitable for all horses.
You can determine which sized gullet your horse needs but using either the Wintec easy change gullet gauge to measure them, or by getting your horse measured by your saddler.
Once you have purchased the right sized gullet for your horse it’s now time to put the gullet into the saddle.
step 2
Find the screws
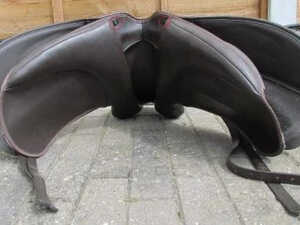
Once you have your new gullet, it’s time to determine where the screws are on your saddle. In older Wintec & Bates saddles screws can be located under the pommel, and can be easily seen if you sit the saddle on it’s cantle as per below.
In newer models the screws can be located either under the skirt at the side of the panel, or concealed via a dropdown D ring.
step 3
Unscrew the screws
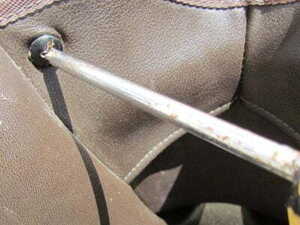
Once you have located the screws, take your screwdriver and begin the process of unscrewing the 2 screws which hold the tab in place, the tab can be found on the underside of the pommel.
Once both screws are out of the saddle place them in an empty pot to keep them safe.
step 4
Find the Velcro tab
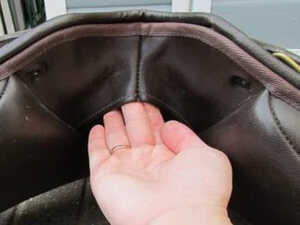
Next, place your fingers underneath the tab on the underside of the pommel, where you should be able to feel Velcro.
Upon feeling this pull the tab downwards which will then unstick the Velcro from the tab and expose the gullet.
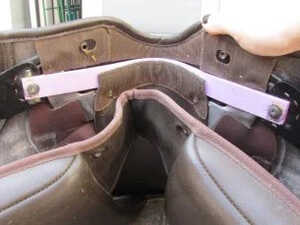
step 5
Expose the sides of the gullet
Next you will need to expose the sides of the gullet in order to remove it fully. You will need to do this by removing the tree plates from their keepers, you will also need to remove any flexiblocs, or point girth straps to do this.
On each side of your Wintec or Bates saddle is a tree plate that sits inside a keeper within the saddle flap. To remove these all you have to do is simply pull down on the saddle flap one at a time, and the tree plate should slide out of place exposing the sides of the gullet, along with two more screws as per pic.
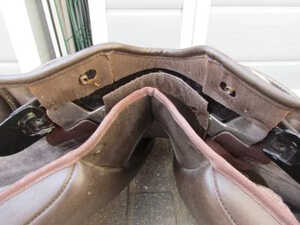
step 6
Unscrew the final screws
Once the tree plates and the sides of the gullet have been exposed, you will then need to unscrew the final two screws which are what keep the gullet in place. Once both screws have been removed and put into the pot with the others, the old gullet can then be taken out of the saddle.

step 7
Fit the new gullet
Now it’s the moment you’ve been waiting for, it’s time to fit your new gullet!
To do this you will first need to take your new gullet and place it behind the Velcro as per the below ensuring you line it up correctly to the screw holes.
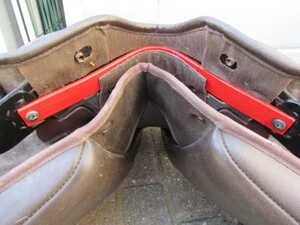
step 8
Screw the gullet into place
You will then need to screw the gullet into place on your saddle, take the screws from the pot and screw them into place securely to ensure the gullet stays in place.

step 9
Refit the tree plates
Next you will need to put the tree plates back into the keepers, if you look down the side of your saddle flap you will be able to see the keepers each side which will look like the pic. Once you have located the keepers, simply slot the tree point back into them firmly and you should be left with something that looks like this.
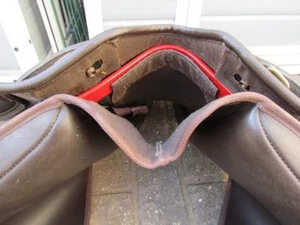
step 10
Stick the tab back to the Velcro
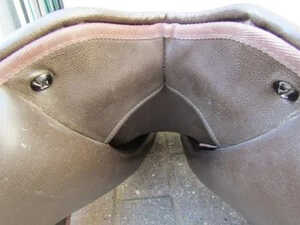
Now comes the trickiest part which is sticking the tab back to the Velcro, when doing this it’s extremely important to line the holes in the protective flap up with the metal cylinders which you will need to screw the screws back into, if you don’t line these up properly you will be unable to put the screws back into the saddle.
step 11
Screw the final two screws back
Once the protective flap is lined up correctly with the screw holes, and stuck back into place, simply screw your remaining two screws back into the saddle ensuring their screwed securely, and you’re done!
See, we told you it was easy!
Saddle Fitters Trade Account
-
Help your customers sell unwanted saddles
-
FREE listing on Sheepham saddles website
-
Enquiries emailed direct from “Saddle Fitter Booking form”
-
Sell your old stock using packaging order line/form
-
Extend your own stock range by taking our saddles on trial.
Posted by Admin on November 14th 2024
